When first accessing an email account through a desktop most of the customers would use and email application like Outlook or Thunderbird. To use your email with these applications you must first set it up. With this guide, you can set this up by following these steps.
HOW TO START
1/ Please log in into your client area at: Client Area
2/ Go to ==> Services ==> ‘My Services
3/ Click on your hosting plan
4/ Go to cPanel (top-left corner)
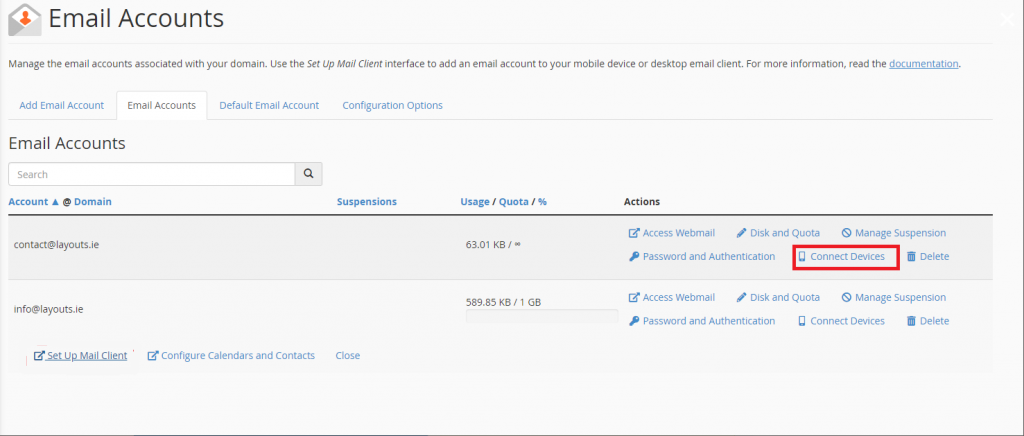
5/ Go to e-mail accounts (Click the e-mail accounts icon on the bottom)
You should now see your email accounts (if any have been created). Select the email account to set up by clicking Connect devices
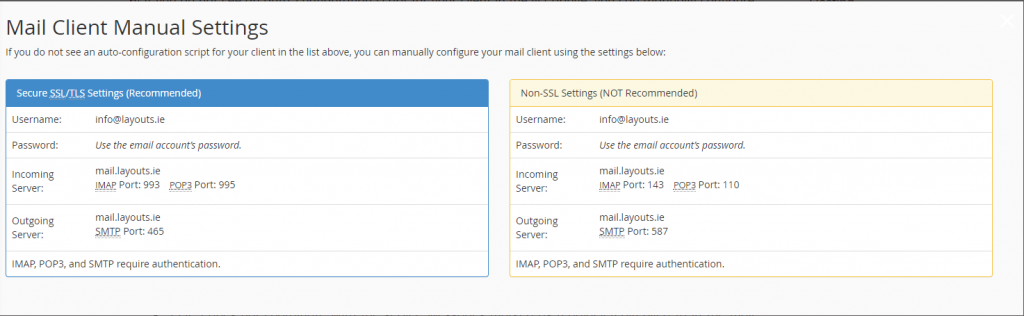
If an auto config script does not appear for your client in the list above, you can do this manually by using the following steps below:
Notes (before we begin):
IMAP email access coordinates between the server and your mail application. Messages that have been read/deleted/replied to will show up as such, both on the server and in the mail application.
POP3 does not coordinate with the server. Messages marked as read/deleted/replied to in the mail application will not show up as such on the server. This means that future mail downloads with POP3 will show all messages as unread.
Outgoing mail is sent using SMTP.
We recommend using POP3 over SSL/TLS or IMAP over SSL/TLS since they provide increased security for your interactions with the remote mail server.
SECURE OR NOT SECURE
Secure SSL/TLS settings are recommended, but if the verification with Outlook isn't successful, please do not use SLL recommended settings (as shown in the example below)
HOW DO I ENABLE SMTP AUTHENTICATION?
An example: Microsoft Outlook 2019 (PC)
Run Outlook
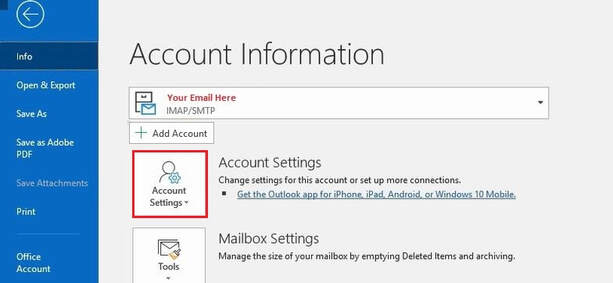
Go to File ==> Account Settings
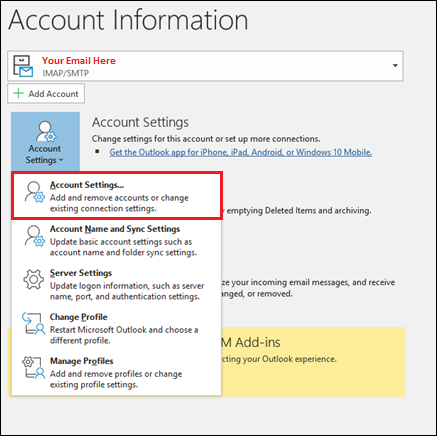
Select the account you are looking to modify & click change
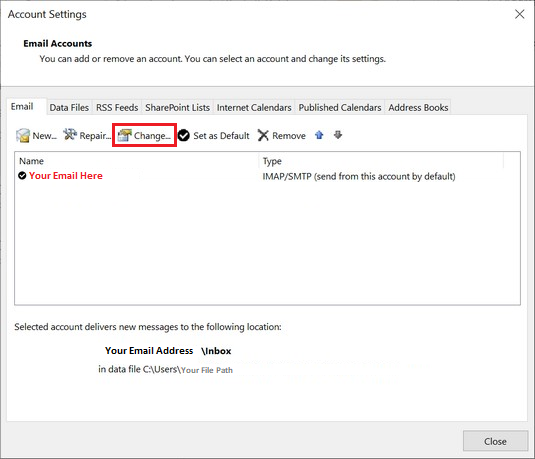
You can change any settings you wish in the Accounts Dialog Box:
In order to change the mail server settings, the repair command must be used as follows:
From the Account Settings dialog box, click on the account and then click 'Repair'.
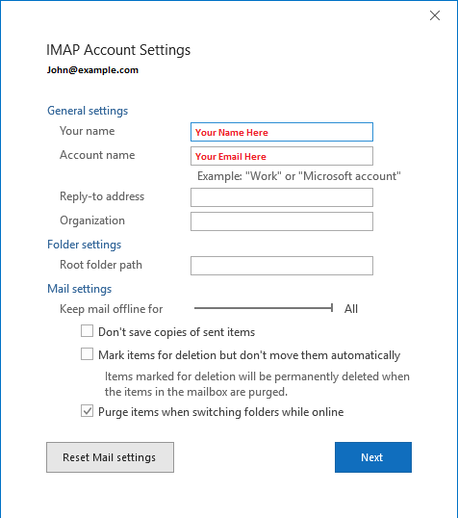
Click Advanced Options
Click on the Let me repair my account manually check box. After that click on Repair
Lastly, change the incoming mail server settings as follows:

Then click the blue Outgoing Mail drop-down & make changes to them as needed:
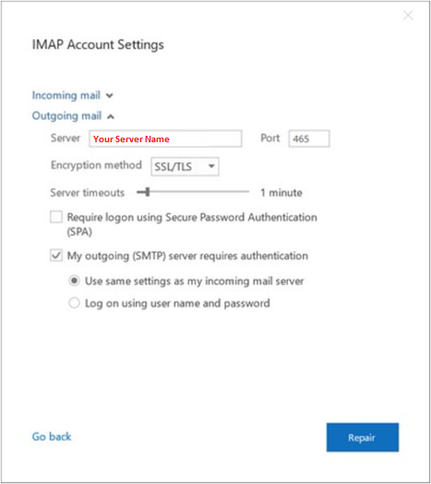
(Please ensure the Server is the same as the server you received in the Blue box at the beginning of this tutorial, you can find this box in cPanel as mentioned previously. Ensure that the Port is also the same as the one in the Blue box.
Finally, select Repair to apply the changes, and then click done.
If you do have any further questions about this article or have any questions regarding any of the setups, you may feel free to email us at support@webworld.ie.
